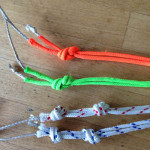
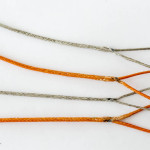

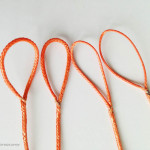
Lines attached, looks 100% neater, and much stronger too….its a win win situation
These line loops, believe it or not take less time to make than sleeving and knotting, or sleeving and sewing…..imagine all your kite lines are within 1mm.
Watch the video at the top of this blog post for the simple instructions on how to make these spliced loops.
PLEASE NOTE:-
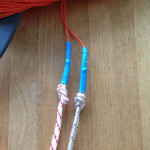
There is an upgrade to this loop if you wish to do this…
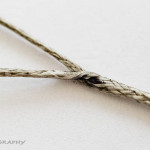
loops on the left with the dyneema inserted, and the ones on the right without
Once you have marked the two dots 10cm apart, if you cut a 10cm piece of line and insert that piece inbetween the dots, then carry on splicing as in the video, you will then have the same thickness inside the loop as the piece immediately after the loop, obviously making the loop slightly thicker will help, especially for the bigger pilots, the loops will dig into the pig tails much less.
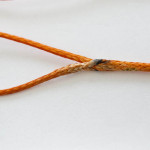
During a race, the last thing you want is a line break, this is just an extra precaution on top of an already stronger loop.
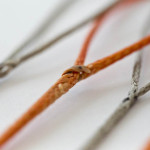
Also, again as a racing precaution, once a year, swap the lines around, from the kite to the handles and handles to the kite, this is because when you loop the kite the twist in the lines will wear the lines away, and potentially cause a line break, swapping the lines around doubles the line life.
Again, thank you to the guys at xxtreme for these line tips.